...
Functionality settings are a way of enabling basic functions on in a study. Not all studies require many functions, so they can be disabled to prevent the system from running those functions.
...
Enforced only on mobile. This causes the user's session to timeout from inactivity. Note, that mobile app operating systems will always cause the app to sign out when it is stopped in memory, regardless of this setting.
...
This blinds the email address for of participant users in the Sign In Audit, the Host’s User Manager, and the Study Site/User Manager
...
Hides the date windows and target date that are normally displayed in the scheduled visit grid within a subject's records. Note, that all date calculations are still happening in the background - including missed visits or forms that are entered outside the allowed window. (New)
...
For ePRO studies, this adds a new option on the Participants' home screen to access previously entered forms that are not review locked. If participants update existing records from the list, the visit date on the form will not be updated.
Allow ePRO Users Access to
...
Expired Forms
For ePRO studies, this adds a ne new option on the Participants' home screen to access missing forms. These are ePRO forms collected within a visit schedule where the windows have expired.
...
| Expand | ||
|---|---|---|
| ||
Open the Study Configuration page and select the Role Security tab.  The image below annotates all the functions in Role Security. See the list below the image for descriptions. 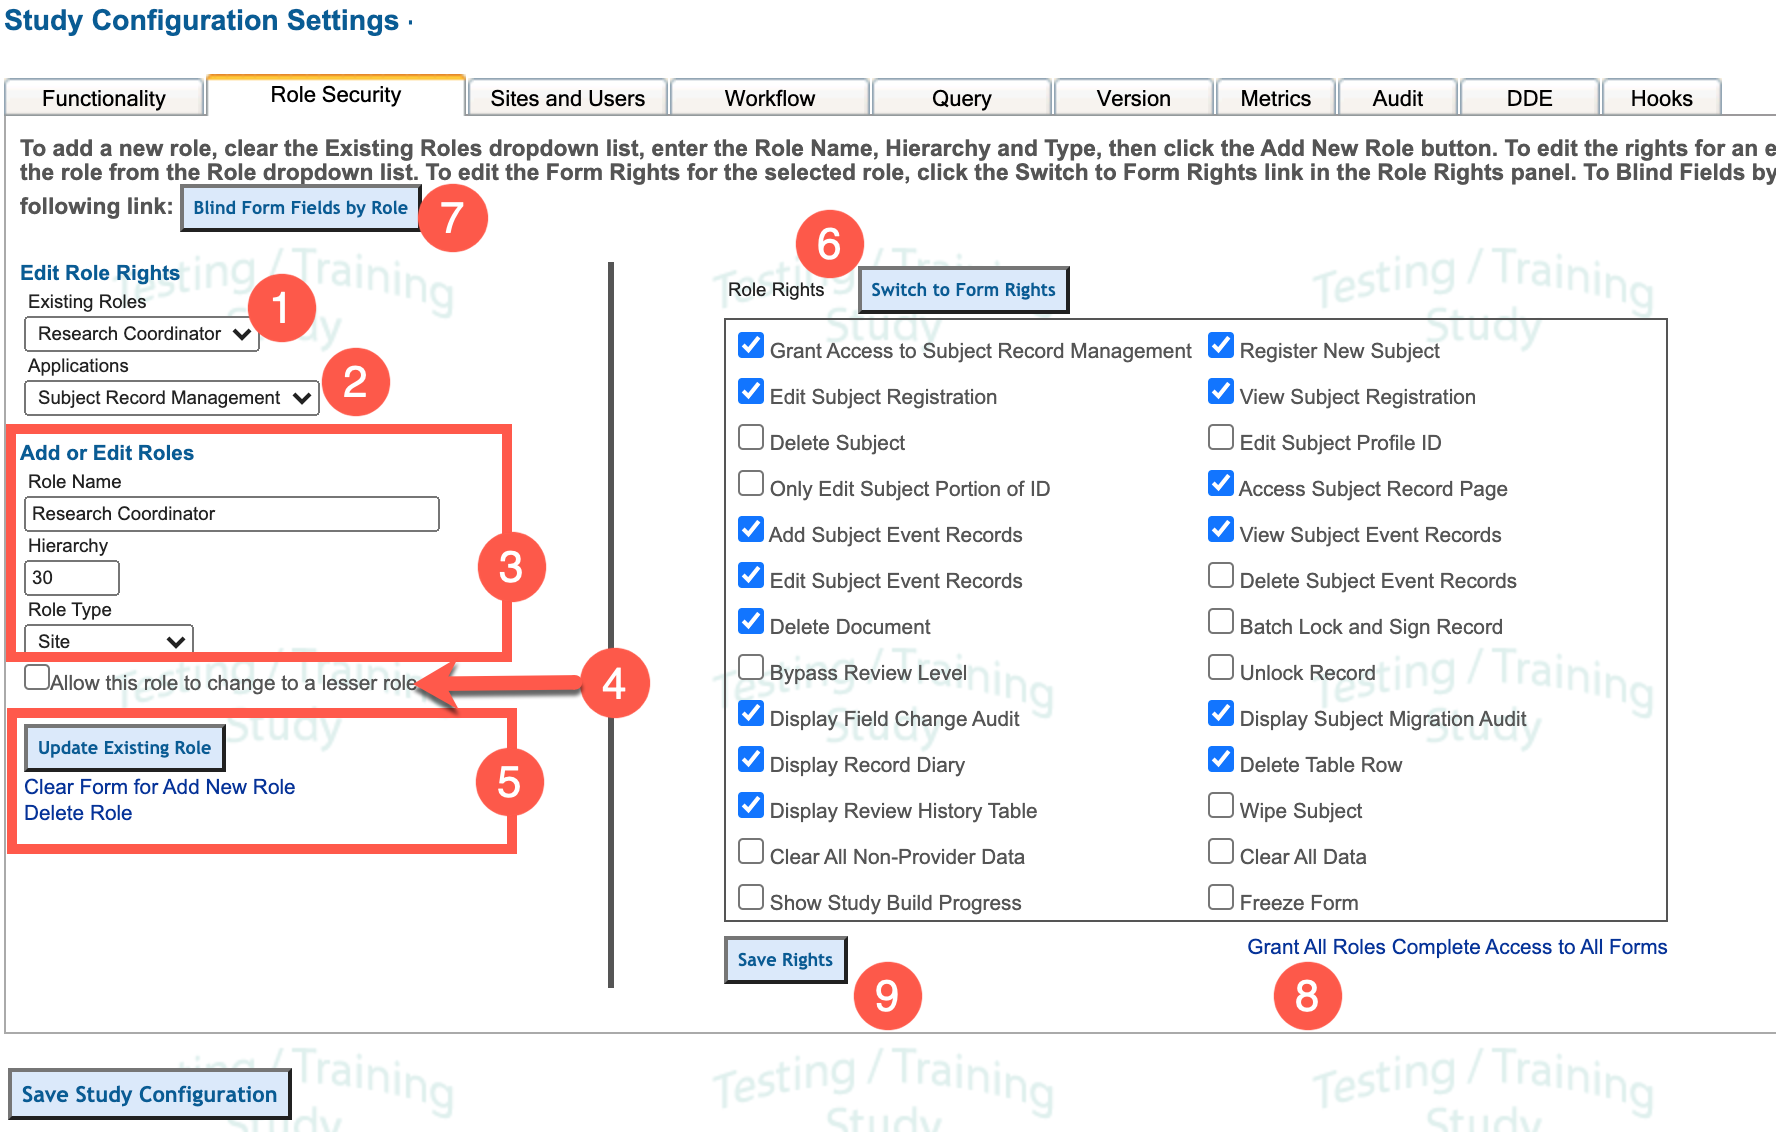
|
| Expand | ||
|---|---|---|
| ||
Access role security under the study settings menu: 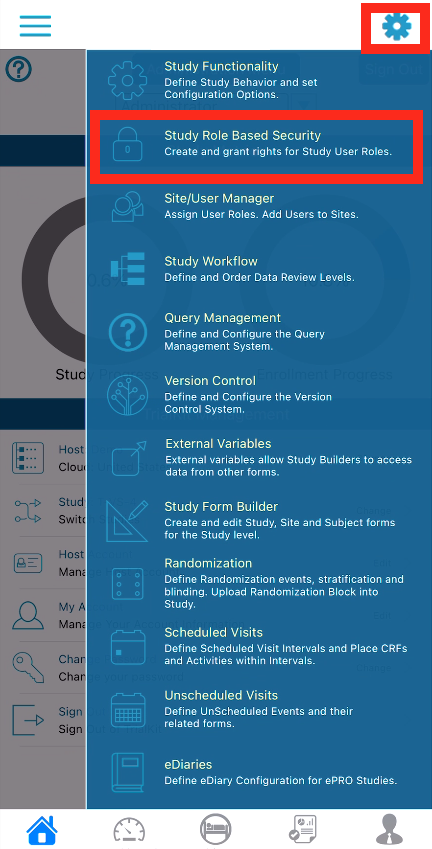 Add new roles or edit existing ones in the list. To delete a role swipe right to left. The role permissions grid is accessible at the bottom of this screen. The grid is a more universal view of all application permissions across all roles in the study. This is also exportable for saving a snapshot of the study permissions at a specific point in time.
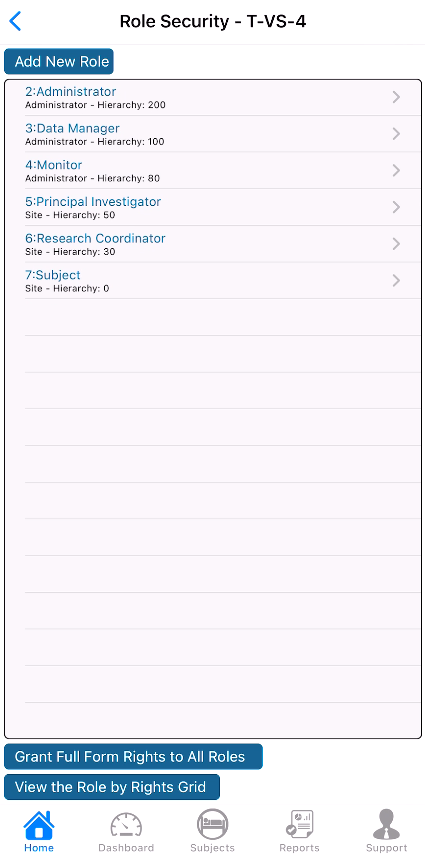 Tap a role to open its details, or tap the form rights button at the bottom to edit view/edit rights for each form in the study. 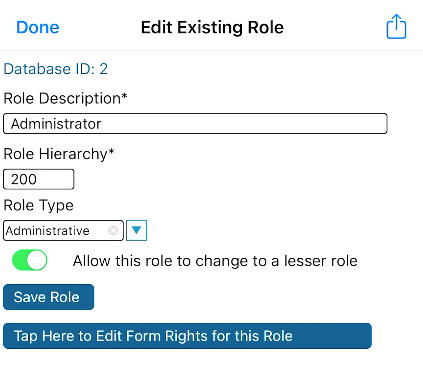 Tap the icon in the upper right to view the study permissions. The application dropdown at the top displays the various functional areas of the system. Within each is are all underlying permissions. 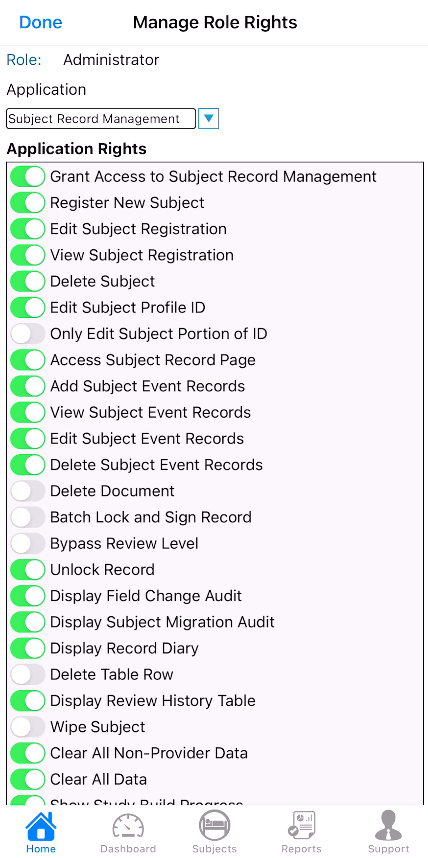 |
...
Role - Role of the reviewer to the system
Status - This must be a value between 10 and 19. Every record in the system has a status based on its current state. The value defined here will be what the database stores as a value for any record reviewed at the corresponding level. This value can display in the data exports and/or the report builder.
...
Adverse Event Field - This is the field (must be a choice field) you want the system to use specifically when counting the number of AEs in various reports. If this is not set, it will default to simply use using the form defined above.
Adverse Event Value - This is the value of the Adverse Event Field selected above that will true a "true" response - or a count in this case.
...
Do Not Send E-Mail Notifications to the Site
If you are concerned about spamming your Site, you can check this setting so email notifications will not be sent to the Site. Remember the My Queries report will report all open queries and allow users to access the entire query dialog. Therefore, it is often not necessary to send query notifications to site users.
...
Query coding is an important function of the Query Management System. Query codes allow for standardizing queries based on the reasons for the query. There are 4 types of query codes, they include:
...
When a query is created or closed manually, it provides the user with a list of possible reasons for creating or closing the query.
...
| Expand | ||
|---|---|---|
| ||
The Version Manager is found under the Study menu: 
After a new version is created, and sites have been included in that version, the system will include any future enrolled subjects in that version. Any subjects that already existed at a site will remain on a prior version unless they are migrated to the more recent version. Important notes when migrating subjects:
To migrate subjects, follow the steps annotated in the image below:
 When subjects are migrated their records are moved to the new version of the forms, possibly only some of which contain actual changes. If there were any changes to the visit schedule or the forms selected to be collected within the visits, those changes can be made directly in the visit schedule setup. Version migration is only related to subject forms and data. |

...
| Expand | ||
|---|---|---|
| ||
Open the study settings to access version control 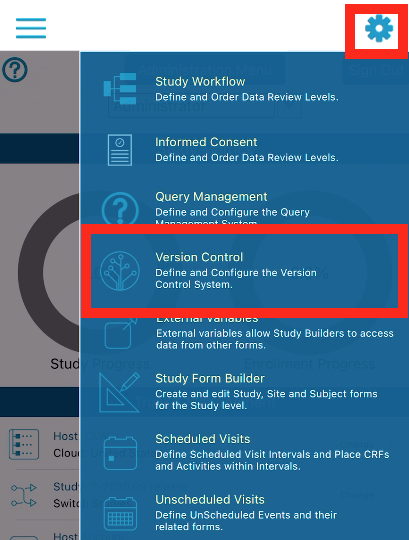 See versions that have been created. This is also where new versions can be created. Tap the Migrate option at the top of the screen: 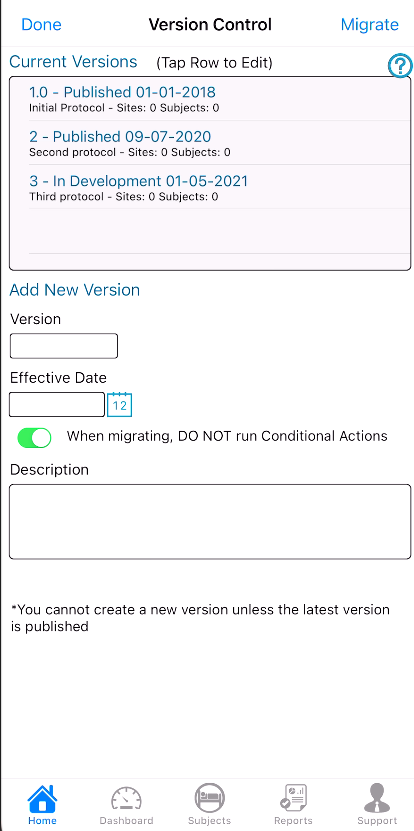 Drag the desired version over to the site which you wish to include in that version moving forward. The option to “Release Version” is used for newly created studies where the study builder wishes to start all sites at version one without individually going through all sites to get them back to the first version. To do this, data must first be cleared from the study.  |
Metrics
Basic metrics can be defined as a means of setting goals regarding the study progress. These are used in two places:
The Dashboard Report
The mobile app home screen progress charts
...
study’s progress. These are used in two places: |
The Dashboard Report
The mobile app home screen progress charts
The Metrics section within the study configuration allows for setting the total number of sites and subjects planned for enrollment.
...
On the mobile app, its found at the bottom of the study functionality screen:
...
The audit settings dictate how the system tracks changes to study data. To access it, open the Study Configuration page and select the Audit tab. Read below the image for a description of each setting.
...
Audit Changes to Subject CRF data
- This tells the system to track data changes on all subject forms.
- When data is changed on an existing subject record, the system will ask the user to provide a reason for changing the data. These reasons can be pre-set and required, as explained in the next few options.
Use coded instead of the free text field for the reason
- If this is checked, when reasons are provided for changing data, it will force the user to use the pre-set options. This makes data management a little easier.
Allow first reason to be inserted for all other reasons
- If several data changes are made on the same record, this option allows (but does not force) the user to enter the same reason for all the changes with one click, rather than going through and providing a reason for each individual field.
- Allows the study designer to provide pre-set reasons for changing data. This may be forced on users or it can be made optional (see #3 above).
...
For Administrators, the audit trail for data entry can be seen globally via the Record Transaction Audit and the Data Change Audit reports. These display all events and changes on in all forms in the study.
...